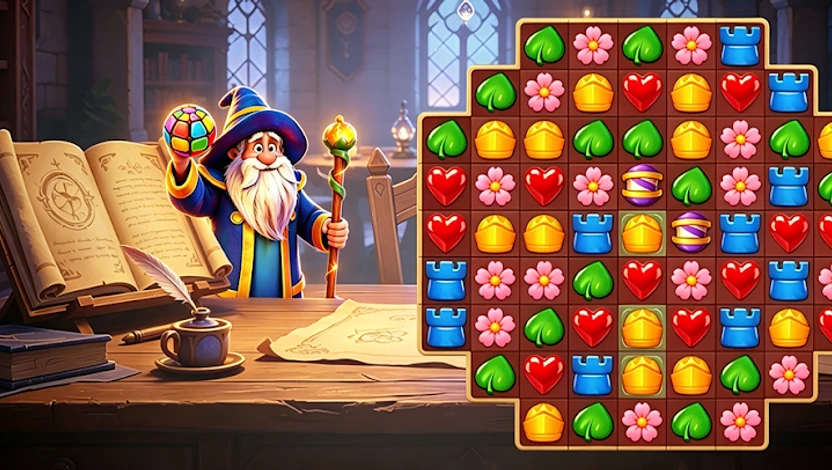
Beyond the Basics: Why Combos Win Levels
Royal Matcher Puzzle rewards players who think in chains, not in isolated matches. A single swap that triggers a three-link cascade can clear more tiles and earn more points than five separate swaps combined, because each successive match in a chain multiplies the score awarded. Once you cross Level 50, the level objectives tighten, the move budgets shrink, and the boards introduce obstacles that punish reactive play. Surviving — and three-starring — these stages demands a deliberate approach to combo construction, special tile management, and move budgeting.
This guide builds on the Royal Matcher Puzzle beginner guide, which covers the core match-3 mechanics, basic power-ups, and the difference between time-limited and move-limited levels. Here we go deeper into the techniques that carry you through the hardest stages: chain architecture, special tile synergy, move budget discipline, and board scanning priority.
Combo Chain Construction
A combo chain is a sequence of matches triggered by a single swap. When your initial match clears, tiles fall into the gap, and if those falling tiles form a new match, the chain extends. Each link in the chain multiplies the points, so a three-link chain is worth far more than three separate single matches. The skill is not in triggering chains by luck — it is in setting them up deliberately.
The building block of every chain is a loaded column: a column where two or more same-color gems are stacked with a single gap. When that gap closes — either by a direct swap or by tiles falling from an adjacent clear — the stacked gems match automatically without consuming a move. A skilled player identifies loaded columns, protects them from accidental clears, and triggers them at the moment that maximizes the cascade.
- Scan for loaded columns first. Before making any swap, identify columns with same-color gems separated by a single gap. These are pre-built chains. Mark them mentally and avoid clearing their top gem, which would break the setup.
- Trigger from the bottom. A match near the bottom of the board shifts more tiles than one near the top, so it has a higher probability of closing a loaded column gap and extending the chain. When two matches are available, always choose the lower one.
- Read the cascade two links ahead. Before committing your trigger swap, trace which tiles fall into the cleared space and whether they form new matches. If the cascade dies after one link, look for a different trigger point that can extend it to two or three links.
- Protect loaded columns from collateral. If a nearby match would clear the top gem of your loaded column, either make the loaded column fire first or move your trigger swap to a different part of the board. Broken chains are the most common cause of failed level objectives.
A three-link chain is worth roughly four to five times the points of a single match. On move-limited levels, one well-built chain can replace four individual swaps and save the move budget. Always spend an extra few seconds planning a chain before you make the trigger swap — the time invested pays back in saved moves.
Special Tile Combinations
Special tiles — line clearers, bombs, and color bombs — are exponentially more powerful when combined. Swapping two special tiles together produces a combined effect that no single special tile can match. Knowing which combinations to save for which situations is the difference between clearing a Level 55 obstacle board and running out of moves.
- Line + Line (Double Line): Clears the full row and full column of the swap point, forming a giant plus shape. Use this to crack open obstacle-dense centers where ice or locked tiles block multiple rows at once.
- Line + Bomb: Clears three full rows and three full columns — a devastating 3×3 cross pattern. This is the best combination for clearing large clusters of obstacles quickly when the move budget is tight.
- Bomb + Bomb: A 5×5 explosion centered on the swap. Ideal for boards where obstacles are concentrated in a single dense pocket that smaller clears cannot penetrate.
- Color Bomb + Line: Converts every gem of the line's color into a line clearer, effectively clearing most of the board in a single cascade. Save this for the moment the board is most crowded to maximize the reshuffle value.
- Color Bomb + Color Bomb: The strongest combination in the game — clears the entire board. Reserve this for emergency saves on the final moves of a level, or for a final-move score burst when you need a specific point threshold.
Never fire two color bombs separately when you can swap them together. A double color bomb clears the entire board and the resulting reshuffle almost always creates new chains. Firing them individually clears two colors — far less value for the same two saved special tiles.
Level 50+ Survival Guide
From Level 50 onward, Royal Matcher introduces compound objectives: clear ice blocks, free locked gems, and reach a score target, all within a move budget of 20 or fewer. These levels are designed to fail players who play reactively. The survival strategies below address the specific pressures of the late game.
Obstacle Priority Over Score
On compound-objective levels, the obstacle (ice, locked tiles, jelly) is almost always the binding constraint, not the score. If you clear the score target with five moves left but still have ice blocks remaining, you lose. Prioritize every swap toward the obstacle first, and treat the score as a byproduct that will accumulate naturally as you clear tiles near the obstacle zones.
Save Special Tiles for Bottlenecks
Late-game levels place obstacles in hard-to-reach corners or behind locked tiles that ordinary matches cannot touch. Do not spend special tiles on easy clears — bank them until you hit a bottleneck where no standard match can progress. A saved line clearer that breaks open a locked corner on move 18 is worth far more than the same tile fired for points on move 5.
Read the Spawn Pattern
New tiles spawn from the top and fall downward. On obstacle levels, tiles that spawn over an ice region can match and clear the ice without a direct swap — but only if the falling tiles are the right color. Watch which colors spawn over your obstacle zones and prioritize swaps that set up those colors to fall into place.
If a level has both ice and locked tiles, free the locked tiles first. Locked tiles cannot be matched or cleared by adjacent matches, so they block the entire row until unlocked. Ice, by contrast, can be chipped away by any adjacent match. Freeing locks early opens up the board and gives you more swap options for the remaining moves.
Move Budget Management
On move-limited levels, your move budget is the only resource that matters. The discipline of budget management is treating each move as an investment with an expected return, and refusing to spend a move on anything with a low return. Here is how to think about it quantitatively.
Before each swap, estimate the return: how many objective-relevant tiles (obstacle hits, target-color gems) will this swap clear? A swap that clears three target gems returns 3. A swap that triggers a two-link chain clearing six tiles, two of which hit ice, returns roughly 8 (six clears plus two obstacle hits). Always choose the swap with the higher return, even if the lower-return swap looks more obvious. Over a 20-move level, choosing a 3-return swap over a 1-return swap ten times is the difference between 30 objective points and 10 — often the margin between three stars and a fail.
Reserve a buffer of two to three moves at the end of the level for cleanup. Players who spend their entire budget on the main objective frequently find one or two obstacle tiles remaining with zero moves left. If you reach the final obstacle phase with fewer than three moves remaining, you have under-budgeted — the solution is to be more efficient earlier, not to rush the endgame.
Board Scanning Priority
Where you look first on the board determines what you find. Random scanning leads to reactive matches; structured scanning leads to chains. Use this priority order every time the board settles after a cascade.
- Bottom-left corner first. Matches near the bottom shift the most tiles and have the highest cascade potential. Start your scan at the bottom-left and move rightward along the bottom row.
- Loaded columns second. After scanning the bottom, look for vertical same-color stacks with a single gap. These are pre-built chains that need only a trigger swap.
- Four-in-a-row setups third. Look for three same-color gems in a line with a fourth one move away. Completing the four creates a line clearer, which is a high-value special tile worth banking.
- Five-in-a-row setups last. These are rare but create color bombs — the most valuable special tile. If you spot a potential five, prioritize setting it up even if it costs a move, because the color bomb's value is higher than any single chain.
Train yourself to scan in the same order every time: bottom-left, across the bottom, then upward. Consistent scanning direction builds muscle memory, so you stop re-scanning areas you already checked. On time-limited levels, this shaves seconds off every decision and compounds into a meaningful time advantage by the final ten seconds.
Common Advanced Mistakes
- Firing special tiles too early. A line clearer used on move 3 of a 20-move level is almost always wasted. Special tiles gain value as the board gets harder to clear, so bank them until you hit a genuine bottleneck.
- Chasing score on objective levels. If the level requires clearing ice, every swap should serve the ice. Points accumulate automatically as you clear tiles near the obstacle — chasing score directly wastes moves that the objective cannot afford.
- Breaking loaded columns accidentally. The top gem of a loaded column is fragile. A single nearby match can clear it and destroy a chain you spent three moves building. Always check whether your swap touches a loaded column before committing.
- Ignoring the spawn direction. Tiles fall from the top. If your obstacle is at the bottom, matches above it will drop the right colors down — but if your obstacle is at the top, falling tiles will never reach it. Adjust your strategy based on obstacle position relative to the spawn point.
Advanced Royal Matcher is a game of architecture: you build chains, bank special tiles, and budget your moves with the discipline of an investor allocating capital. Open the game with the Play Now button above, pick a Level 50+ stage that has been blocking you, and apply the scanning priority and chain construction method move by move. The difference between one star and three is not luck — it is the structure you bring to each board.